
This article will present how the python package splash can be used to scrape dynamic content from a website. More precisely, I will download some images.
💡 Scrapy is a useful web-crawling framework in Python.
However, Scrapy can only handle static websites, a static website is a website with fixed content coded in HTML and displayed in a browser exactly as it is stored.
A dynamic website however contains content that changes depending on different factors.
To crawl those sites, a browser to run JavaScript in is needed. Splash is that javascript rendering service that will load the dynamic content.
This article will show you how to set it up and how to use it.
How to Set Up Splash
First off, let’s look at how to install and set up splash.
There is a little more to this than just installing the python package using pip.
To run splash, a software named docker is needed.
🎓 Docker is an open-source containerization platform. It enables developers to package applications into containers, standardized executable components combining application source code with the operating system libraries and dependencies required to run the code in any environment.
Use this link to download docker:
After docker is installed and you can start the docker app, execute the following command in a shell. This will download the splash docker image.
docker pull scrapinghub/splash
After that, in the docker app. Select images, scrapinghub/splash should now be available there, like in the image below. From here, press the run button on the right of the image.

Then this window will appear, press the optional settings to expand it.
Fill in the name you want for the container, I simply used “splash” for mine.
The “Local host” field will also need to be filled in. It suggests 8050 by default so I decided to go with that. After these fields are filled in, press the run button in the lower right corner of the window.

In your docker app, navigate to Containers / Apps, the splash container should now appear, like this.
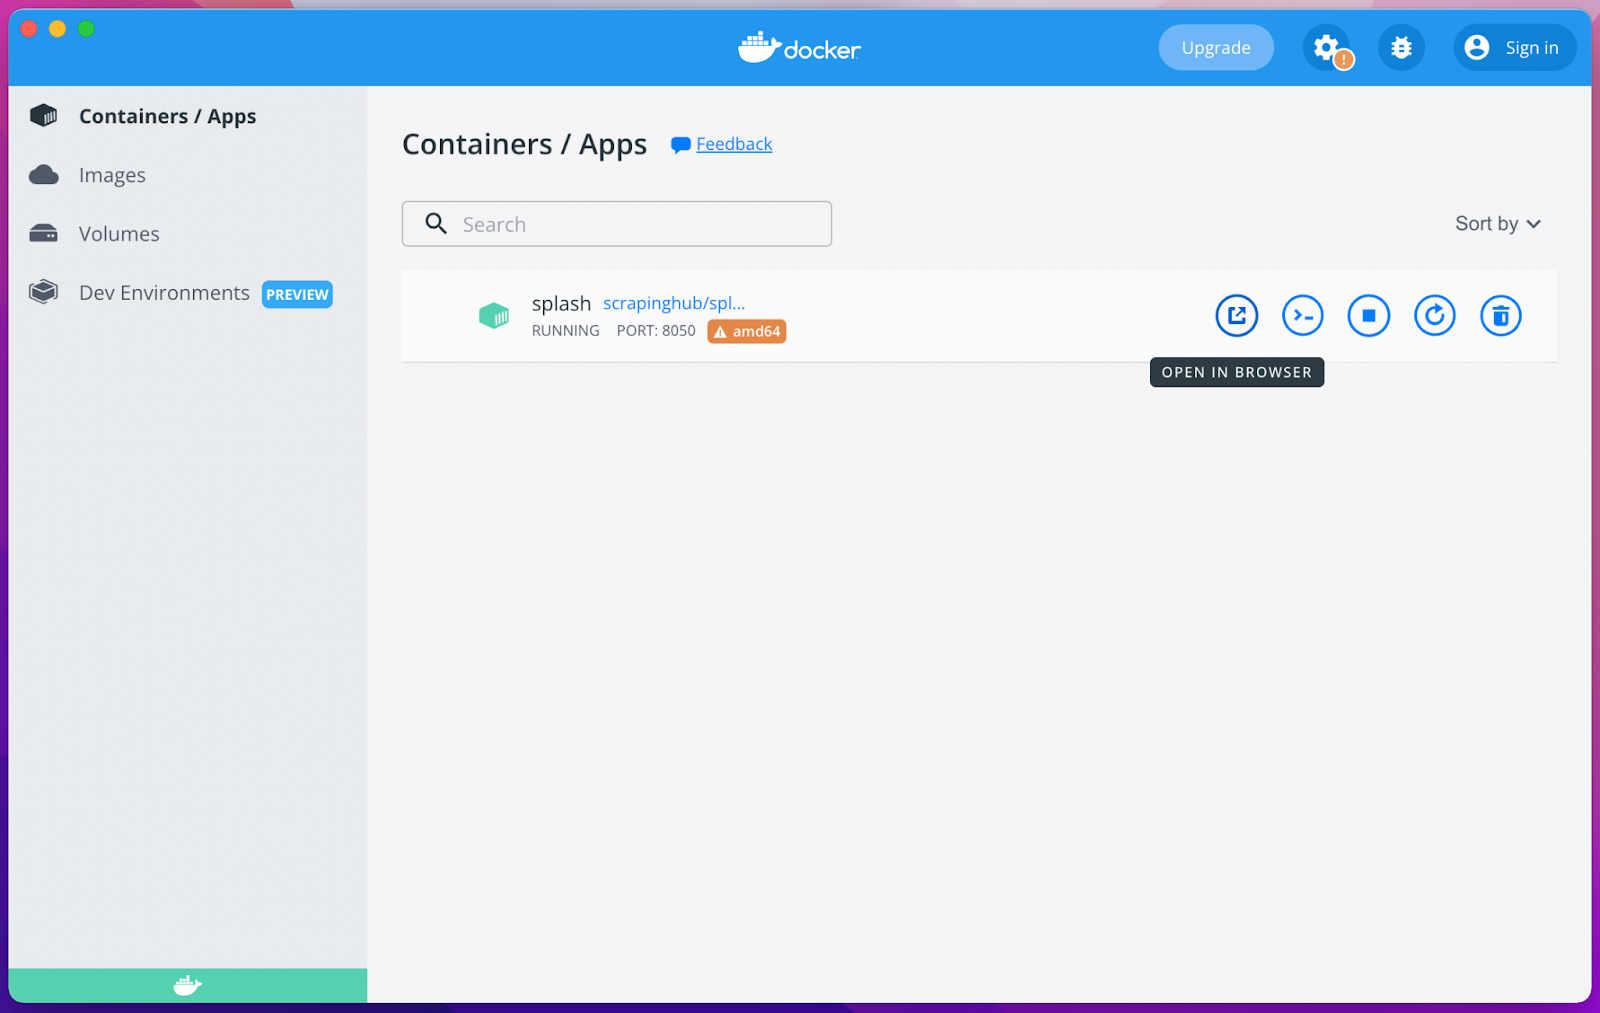
To make sure everything is running as it should, either start a browser and type in http://localhost:8050/. Or press the button that says open in browser like in the image above, that will start your preferred browser and search for http://localhost:8050/.
If everything is well and working, then this site should appear.
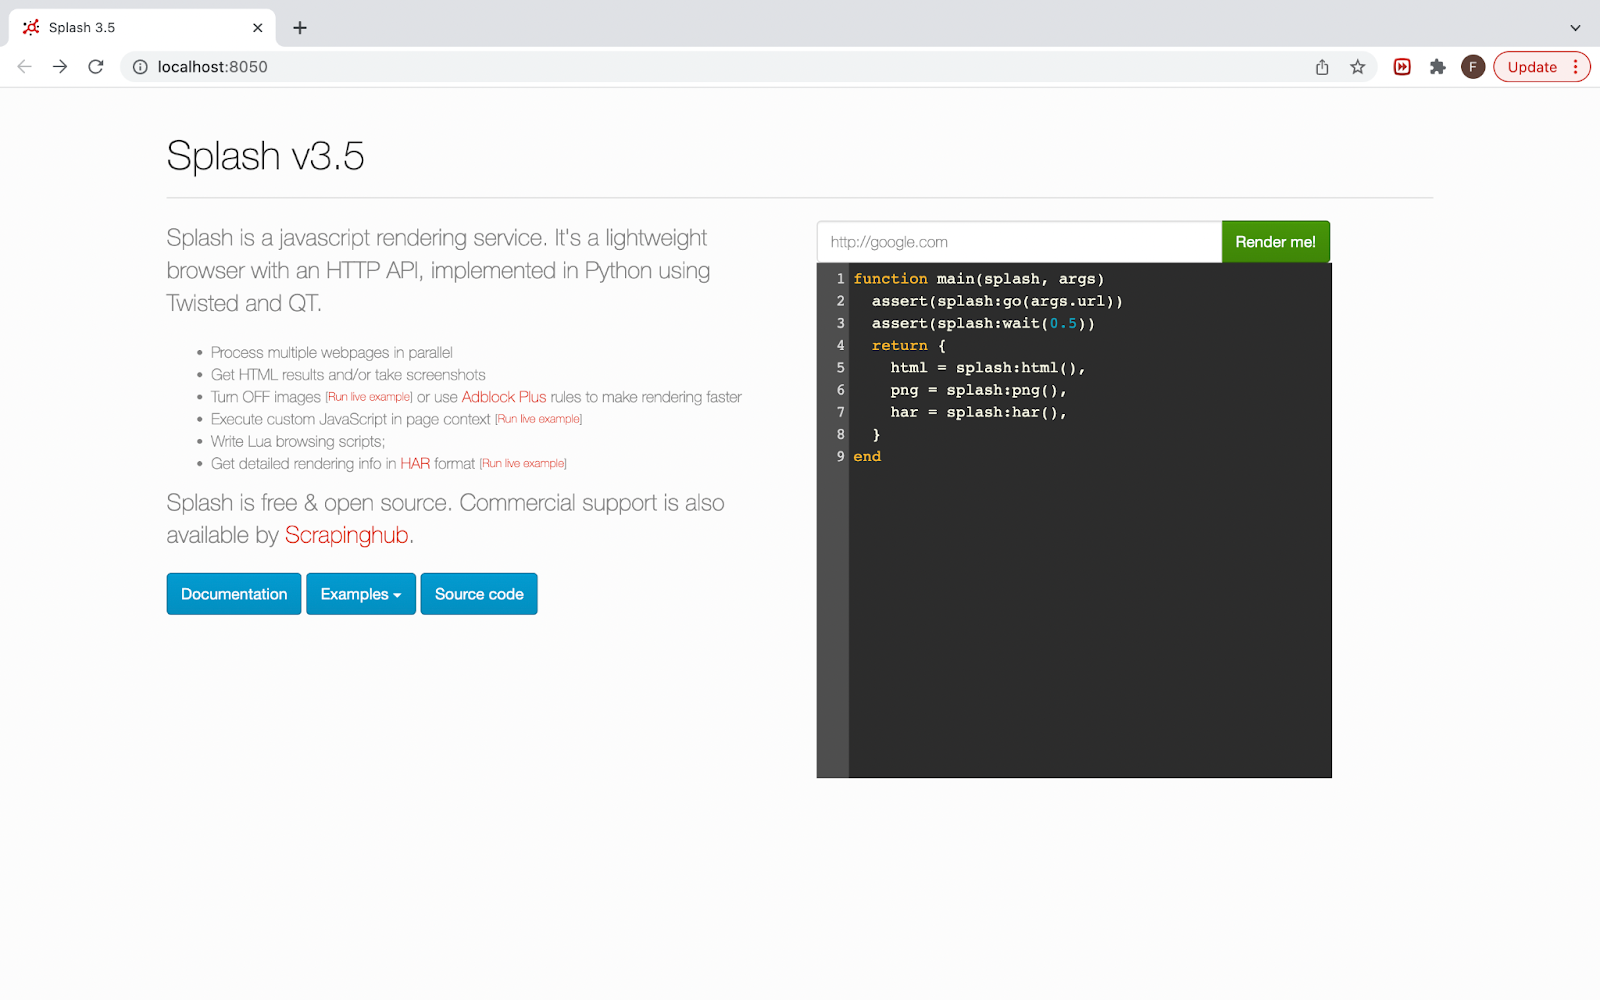
I will also include a link to splash in references on how to install docker and set it up to use splash[1]
Now it’s time to install the splash package using pip. Run the following command in the shell in your environment of choice to download and install splash.
pip install scrapy-splash
Once scrapy-splash has been successfully installed, everything should be good to go.
Website From Which to Scrape Images
The website that I will download the images from is the Finxter website and the section containing books. You can access it here.
I will download and save an image of all the book covers that are on there. The site and the book covers look like this.

All and all, there are 14 books on this site meaning that I will download 14 images.
Let’s inspect one of the book covers using Chrome’s inspect tool. I selected the first book cover and its img-element looks like this.

I can see that inside the img-element of the first book cover, it says “lazy-loaded” in one place. This probably means that the site uses lazy-loading so that an object is not initialized until it is needed. This would be a problem for scrapy on its own but combined with splash I will be able to access it.
How to Use the Scrapy Shell in a Project?
I will start by creating a scrapy project for this task, navigate to the folder on your computer where you want your project stored and execute the following command in the shell:
scrapy startproject finxterbookscraper
“finxterbookscraper” is the name that I chose for this project and it is the part that you will change when creating your own projects.
When I run the “tree” command in the shell it looks like this.

Be aware that this image is taken after I had already created my spider so that is why “bookspider.py” is in there already.
I then run a scrapy shell to have a look at the website and see where I can extract the information that I’m looking for. I run the following command in the shell.
scrapy shell
This will start a scrapy shell for me which is very nice to use before you start writing the code for your spider in order to understand how to extract the information that you are interested in. In the scrapy shell I run the following command.
fetch('https://blog.finxter.com/finxter-books/')And get the following output.

The “Debug: Crawled (200)” part tells me that my request to the given website was successful and I got a response.
When I inspected the html-code earlier I found that each img-element for the book covers was in a span-element. I select these and save them as books with this command.
books = response.css('span.tve_image_frame')If I print the length of books it should be 14, one selector object for each book.
I’m interested in extracting the “srcset” attribute of the img-element since that contains URLs to the images that I need. Therefore I run this command to get the “srcset” attribute of the first book.
books.css('img').attrib['srcset']That gives me the output.

So when I try to get the “srcset” attribute for the first book cover on the site I get a KeyError.
The “srcset” attribute contains a path to the image I want to download. In fact, for this website, it contains multiple image URLs. The different image URLs have different sizes.
That is why the “srcset” attribute is called a responsive image, meaning that depending on factors such as how wide the current window is, the site will load different image sizes.
The “srcset” attribute holds multiple image URLs. Since I can’t access it using scrapy, it is a part of the dynamic content of the website, something that needs javascript rendering to be accessed.
Time to use splash!
Let’s make a new fetch command like this.
fetch('http://localhost:8050/render.html?url=https://blog.finxter.com/finxter-books/')It should produce the following output if it is working.

I once again retrieve the books.
books = response.css('span.tve_image_frame')And then I try to get the srcset attribute again.
books.css('img').attrib['srcset']And this time it produces the content of the “srcset” attribute of the selected img-element like this.

So, I was able to select an attribute using splash, something that scrapy could not do for me.
Now that I have figured out what it is that I wanted in the scrapy shell, it is time to construct a spider to collect information about all the 14 book covers that I’m interested in and download them for me.
This part was mostly to show the difference in using scrapy on its own or combined with splash.
If you are using the shell it might be a good idea to extract the image URLs for all 14 book covers to make sure that it works for them all.
Creating a Spider with Splash
Before I write the code for the actual spider, I need to do some altercations in the settings file for my scrapy project to make it work with splash.
I wrote the code for this project in Pycharm IDE. In your scrapy project folder select the settings.py file and open it for editing.
For me when I open it in Pycharm, it looks like this.

So the part to pay attention to here are the lines written below splash setup. These ones.
# Splash setup
SPLASH_URL = 'http://localhost:8050/'
DOWNLOADER_MIDDLEWARES = {'scrapy_splash.SplashCookiesMiddleware': 7,
                        'scrapy_splash.SplashMiddleware': 725,
                        'scrapy.downloadermiddlewares.httpcompression.HttpCompressionMiddleware': 810}

SPIDER_MIDDLEWARES = {'scrapy_splash.SplashDeduplicateArgsMiddleware': 100}
DUPEFILTER_CLASS = 'scrapy_splash.SplashAwareDupeFilter'
HTTPCACHE_STORAGE = 'scrapy_splash.SplashAwareFSCacheStorage'
I put them in here as code so you can copy and paste into your own settings.py file. You can paste them anywhere in the file. Just make sure that you have them otherwise splash will not work. Save the file and exit.
So the code for the spider itself. Below is the code that I wrote to do the job.
import scrapy
from scrapy_splash import SplashRequest
from PIL import Image
import io
import requests

class bookspider(scrapy.Spider):
  name = 'book'
  url = 'https://blog.finxter.com/finxter-books/'

  def download_image(self, download_path, url, file_name):
      try:
          image_content = requests.get(url).content
          image_file = io.BytesIO(image_content)
          image = Image.open(image_file)
          path = download_path + file_name
          with open(path + '.jpg', 'wb') as f:
              image.save(f, 'JPEG')
      except Exception as e:
          print('FAILED -', e)

  def start_requests(self):
      yield SplashRequest(url=self.url, callback=self.parse)

  def parse(self, response):
      download_path ='/Users/fredrikekengren/Documents/Finxter_books/'
      books = response.css('span.tve_image_frame')

      for book in books:
          if book.css('img::attr(srcset)').get():
              image_url = book.css('img::attr(srcset)').get().split()[2]
          else:
              image_url = book.css('img::attr(src)').get()
          name_of_book = book.css('img::attr(title)').get()
          self.download_image(download_path, image_url, name_of_book)
The code did not turn out to be as elegant as I would have hoped for. First off, it turned out that not all of the img-element had the “srcset” attribute so I had to get the “src” attribute for some of the images.
I will refer back to what I wrote in the section where I used the shell. I should have checked that what I did worked for all the image-URLs and not just the first one. You can’t always assume that the html-code will be the same for all the elements even if they are of the same kind.
To get the right link from the “srcset” attribute I had to use split and get the third element from that split. So let’s walk through some of the different parts of the code.
  def download_image(self, download_path, url, file_name):
      try:
          image_content = requests.get(url).content
          image_file = io.BytesIO(image_content)
          image = Image.open(image_file)
          path = download_path + file_name
          with open(path + '.jpg', 'wb') as f:
              image.save(f, 'JPEG')
      except Exception as e:
          print('FAILED -', e)
This function is what actually downloads and saves the images to my documents folder.
It is a function that uses the python Pillow package to save the picture as JPEG formatted images.
The parameters of the function:
download_path: where I want the image to be downloaded to. In my case I wanted to store them in a folder named “Finxter_books” in my documents folder.url: the URL to the imagefile_name: the name I want the saved image to have.
The next lines will get the content of the image-URL, convert it to an image file, open that image file using Pillow, save it to a variable and lastly save the image to my specified path and with the name I want.
I used the “title” attribute from the img-element as the name of the saved images, I will show you below how that was extracted.
def start_requests(self):
      yield SplashRequest(url=self.url, callback=self.parse)

def parse(self, response):
      download_path ='/Users/fredrikekengren/Documents/Finxter_books/'
      books = response.css('span.tve_image_frame')

      for book in books:
          if book.css('img::attr(srcset)').get():
              image_url =book.css('img::attr(srcset)').get().split()[2]
          else:
              image_url = book.css('img::attr(src)').get()
          name_of_book = book.css('img::attr(title)').get()
          self.download_image(download_path, image_url, name_of_book)
These two functions do web crawling.
- The
start_requestsfunction yields aSplashRequestusing the URL provided and a callback to theparsefunction. - In the
parsefunction I specify thedownload_pathwhere I want the images saved. If you are going to reproduce this code, remember to change this bit to your own path.
I select the books and loop through each of them to extract the image-URL and the name of the book from the “title” attribute of the img-element. I then pass that to the download_image function.
These Scrapped Images Are Now in Your Folder
From the shell, navigate to your scrapy project folder and execute the following command to run the spider.
scrapy crawl book
Where “book” is the name of my spider. You can set the name of your spider to whatever you want when writing the code for the spider.
After the crawling is done my Finxter_books folder looks like this.

14 images, all of the book covers were retrieved so the spider did what it was supposed to do. They are all named by their titles, or I should say, they are named by the title of the img-element where I found the image URL since I know that the name of one of the books is not “cover_new”.
Conclusion
So this guide has hopefully shown the power of splash, how to set it up and to collect information using it.
Now, I will say that I could have found the URLs to the images for this project only using scrapy since I found out that the “src” attribute of the img-element was not part of the dynamic content and could have been accessed without splash.
This is not always the case though. Some websites keep a lot of their content dynamic and can not be accessed without rendering javascript to load it, so if you were to stumble across one of those then splash should be your friend.
I hope you enjoyed the guide and happy crawling.