

First, I installed Telegram on my PC. In Telegram, I use the search box to look for BotFather and follow the instructions to create my Recipe bot.
I start with /newbot to create a new bot as the name shows. Then I choose the name for my bot and username (it needs to finish with “bot” for example “recipe_bot”). Afterward, I need my chat_BOT _ID.
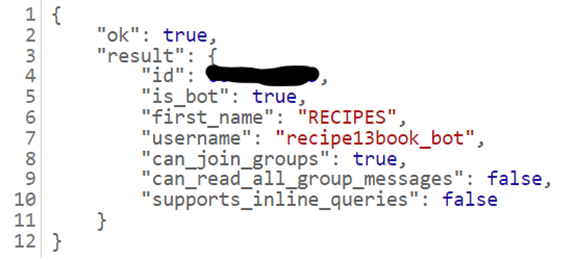
By entering: https://api.telegram.org/bot<yourtoken>/getMe,
In place <yourtoken> I entered my HTTP API that I created in BotFather to get my ID.
In the next step in BotFather, I made a few changes in settings:
- 1. I have added a photo with
/setuserpiccommand, - 2. I have changed the description with
/setdescriptioncommand, - 3. I have changed the bot description with
/setdescriptioncommand.
I decided that my Bot will use AL so I have connected it with OpenAI to get any recipe I want.
For the next stage, I have created code In VsCode:
Step 1. Import Libraries
I’ve imported the necessary libraries and modules. Httpx is for making asynchronous HTTP requests. The Telegram library is for interacting with the Telegram API. OpenAI is to interact with the OpenAI API. Libraries os and dotenv are for environment variable management.
import httpx
from typing import Final, List
from telegram import Update, ReplyKeyboardMarkup
from telegram.ext import (
    Application,
    CommandHandler,
    MessageHandler,
    filters,
    CallbackContext,
)
import openai
import os
from dotenv import load_dotenv
from telegram.error import TelegramError
from openai import OpenAIError
import logging
Step 2. Load Environment Variables
I load_dotenv() environment variables from a .env file.
load_dotenv()
Step 3. API Key
I set up constants for the Telegram bot token, bot username, and API key. SEARCH and RECIPE are constants representing different states.
TOKEN: Final = os.getenv("TELEGRAM_BOT_TOKEN")
BOT_USERNAME: Final = "@recipe13book_bot"
openai.api_key = os.getenv("OPENAI_API_KEY")


SEARCH, RECIPE = range(2)
Step 4. Asynchronous Start
I define the behavior when the user sends the “/start” command.
async def start(update: Update, context: CallbackContext):
    await update.message.reply_text(
        "Hello, I am Recipe Bot! I can help you with your cooking ideas."
    )
Step 5. Recipe Function
I Set up the bot to wait for the user’s input about ingredients.
async def recipe(update: Update, context: CallbackContext):
    if not context.user_data.get("waiting_for_ingredients", False):
        context.user_data["waiting_for_ingredients"] = True
    await update.message.reply_text(
        "Please write your favorite ingredients or name of your favorite food, and I will help you find a recipe."
    )
    return SEARCH
Step 6. Handline User Response
I set up handle the user’s responses and interact with the OpenAI API to generate a recipe. During the waiting time for the recipe, it displays the “Please wait” message.
async def handle_responses(update: Update, context: CallbackContext) -> int:
    user_input = update.message.text


    if context.user_data.get("waiting_for_ingredients", False):
        # Inform the user that the recipe is being fetched
        await update.message.reply_text("Please wait, your recipe is on the way! :)")


        # Create a conversation with user's message
        conversation = [
            {"role": "system", "content": "You are a helpful recipe bot."},
            {"role": "user", "content": user_input},
        ]


        response = openai.ChatCompletion.create(
            model="gpt-3.5-turbo",
            messages=conversation,
            max_tokens=250,
        )


        response_message = response["choices"][0]["message"]["content"]
        if response_message:
            await update.message.reply_text(response_message, parse_mode="Markdown")
        else:
            await update.message.reply_text(
                "I couldn't find a recipe for that. Please try again."
            )


        context.user_data["waiting_for_ingredients"] = False


    else:
        await update.message.reply_text("Please wait, your recipe is on the way! :)")


    return RECIPE
Step 7. Asynchronous Connection Check
I defined a function that asynchronously checks the connection to the OpenAI API.
async def check_openai_api_connection():
    try:
        async with httpx.AsyncClient() as client:
            response = await client.get(
                headers={"Authorization": f"Bearer {openai.api_key}"},
            )
            return response.status_code == 200
    except Exception:
        return False
Step 8. Error Handling
I defined a function that handles errors and logs them. It sends an error message to the user.
async def error_handler(update: Update, context: CallbackContext):
    try:
        raise context.error
    except TelegramError as e:
        logging.error(f"Telegram error: {e}")
    except OpenAIError as e:
        logging.error(f"OpenAI error: {e}")
    except Exception as e:
        logging.error(f"An error occurred: {e}")
    finally:
        # Send an error message to the user
        await update.message.reply_text("An error occurred. Please try again later.")
Last Step 9. Main Code Execution
It is a Main Execution of the code:
if __name__ == "__main__":
    print("Starting bot...")
    app = Application.builder().token(TOKEN).build()


    app.add_handler(CommandHandler("start", start))
    app.add_handler(CommandHandler("recipe", recipe))
    app.add_handler(MessageHandler(filters.TEXT, handle_responses))
    app.add_error_handler(error_handler)


    print("Polling...")
    app.run_polling(poll_interval=3)
Now I can go back to Telegram and test my Bot 🙂
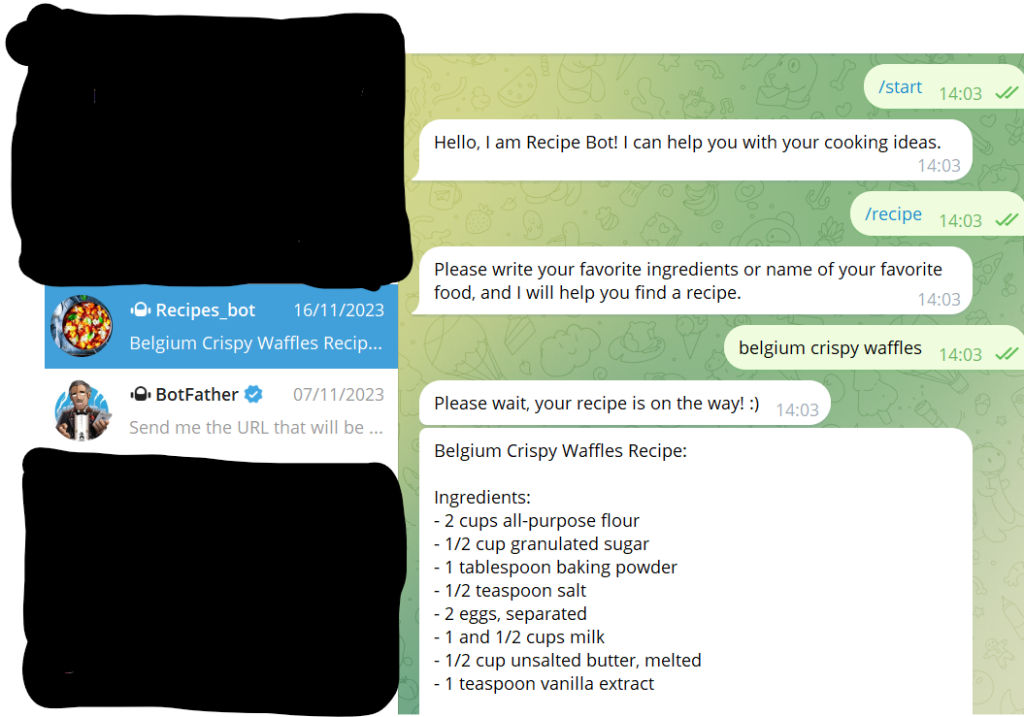
I hope you enjoyed my easy tutorial.