

Welcome to the bonus content of “The Book of Dash”. 🤗
Here you will find additional examples of Plotly Dash components, layouts and style. To learn more about making dashboards with Plotly Dash, and how to buy your copy of “The Book of Dash”, please see the reference section at the bottom of this article.
This article will focus on the dcc.Checklist component from Plotly, and the dbc.Checklist from the dash-bootstrap-components library.
The Checklist component renders a set of checkboxes to allow the user to select one or more items. We’ll show you how to make an app with a checklist interactive with callbacks, but first let’s look at ways to style the checklist.
Plotly Dash dcc.Checklist
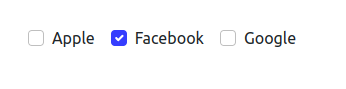
Here is a very simple Dash app. It just displays a Checklist.

from dash import Dash, dcc, html

app = Dash(__name__)

checklist = dcc.Checklist(options=["Apple",  "Facebook", "Google"], value=["Facebook"])

app.layout = html.Div(checklist)

if __name__ == "__main__":
    app.run(debug=True)
In the app above, the checklist is defined as:
checklist = dcc.Checklist(optons=["Apple", "Facebook", "Google"], value=["Facebook"])
The options prop is used to define the list of items that a user can select. The value prop defines which items are selected.
Note that instead of using keyword arguments for the options and value, you could use positional arguments:
checklist = dcc.Checklist(["Apple", "Facebook", "Google"], ["Facebook"])
The options prop can also be a dictionary. Use a dictionary when you want to add more features to the options, such as formatting the label, or making certain options disabled.
The next example shows how to include a “label” and a “value” for each option. Here, the “label” is the company name, and the “value” is the stock ticker symbol.
In a later example, you will see how the stock ticker is used to look up price data for the stock.
checklist = dcc.Checklist(
    options=[
        {"label": "Apple", "value": "AAPL"},
        {"label": "Facebook", "value": "FB"},
        {"label": "Google", "value": "GOOG"},
    ],
    value=["FB"],
)
Dash Bootstrap dbc.Checklist
If you are usingdash-bootstrap-components in your app, then when you use the dbc.Checklist (from the dash-bootstsrap-components library) rather than dcc.Checklist (from the Plotly dash-core-components library), the checklist will be automatically styled with the fonts, colors and other design features of your selected Bootstrap theme.
from dash import Dash
import dash_bootstrap_components as dbc

app = Dash(__name__, external_stylesheets=[dbc.themes.BOOTSTRAP])

checklist = dbc.Checklist(
    options=[
        {"label": "Apple", "value": "AAPL"},
        {"label": "Facebook", "value": "FB"},
        {"label": "Google", "value": "GOOG"},
    ],
    value=["FB"],
    inline=True,
    id="checklist"
)

app.layout = dbc.Container(checklist, fluid=True)

if __name__ == "__main__":
    app.run(debug=True)
You can change the theme of your app with one line of code, simply by changing the external_stylesheets. Here is the dbc.Checklist with a few of the 26 themes available in the dash-bootstrap-components library.
Learn more about designing your Dash app with a Bootstrap theme at the Dash Bootstrap Theme Explorer, a site made by Ann Marie Ward, a co-author of “The Book of Dash”.
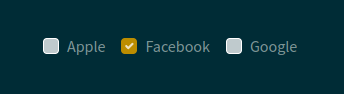
Cyborg theme:

app = Dash(__name__, external_stylesheets=[dbc.themes.CYBORG])
Solar theme:
app = Dash(__name__, external_stylesheets=[dbc.themes.SOLAR])
Minty theme:
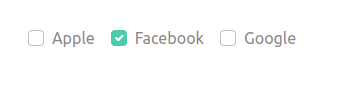
app = Dash(__name__, external_stylesheets=[dbc.themes.MINTY])
dcc.Checklist with Icons
You can add icons to the checklist label with the Dash Iconify library. You can also specify the color, size, rotation, flip, style and more. See the props available in Dash Iconify GitHub.
Dash Iconify gives you access to over 100,000 free icons. Browse the icon sets here.

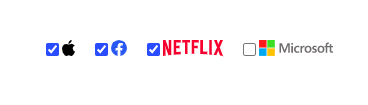
Here is an example of adding icons to the checklist label in a Dash app:
from dash import Dash, dcc, html
import plotly.express as px
from dash_iconify import DashIconify

df = px.data.stocks()

checklist = dcc.Checklist(
    options=[
        {
            "label": DashIconify(
                icon="logos:apple",
                style={"marginRight": 16},
            ),
            "value": "AAPL",
        },
        {
            "label": DashIconify(icon="logos:facebook", style={"marginRight": 16}),
            "value": "FB",
        },
        {
            "label": DashIconify(icon="logos:netflix", style={"marginRight": 16}),
            "value": "NFLX",
        },
        {
            "label": DashIconify(icon="logos:microsoft", style={"marginRight": 16}),
            "value": "MSFT",
        },
    ],
    value=["AAPL", "FB", "NFLX"],
)

app = Dash(__name__)

app.layout = html.Div(checklist)


if __name__ == "__main__":
    app.run_server(debug=True)
Plotly Dash App with an Interactive Checklist
Now, let’s add a callback to make the checklist interactive. This app will return a different message based on what items the user selects.
This example also has a label above the checklist. It’s common to add a label with an html.Div component, however if you use an html.Label (or dbc.Label with dash-bootstrap-components), there are several advantages:
The label text is not only visually associated with its corresponding text input; it is programmatically associated with it too. This means that, for example, a screen reader will read out the label when the user is focused on the form input, making it easier for an assistive technology user to understand what data should be entered.
When a user clicks or touches/taps a label, the browser passes the focus to its associated input (the resulting event is also raised for the input). That increased hit area for focusing the input provides an advantage to anyone trying to activate it — including those using a touch-screen device.
In the example below, note that the html.Label must include the htmlFor prop set to the same id as the checklist.

from dash import Dash, dcc, html, Input, Output

app = Dash(__name__)

topping_checklist = html.Div(
    [
        html.Label("Select Toppings", htmlFor="toppings"),
        dcc.Checklist(
            [" pepperoni", " mushroom", " extra cheese", " sausage", " olives", " green pepper"],
            id="toppings",
        ),
    ],
    style={"marginBottom": 20},
)

app.layout = html.Div([topping_checklist, html.Div(id="confirmation")])


@app.callback(
    Output("confirmation", "children"),
    Input("toppings", "value"),
)
def update(toppings):
    if not toppings:
        toppings = "no extra toppings"
    else:
        toppings = ", ".join(toppings)
    return html.Div(f"Your pizza with {toppings} will be ready in 30 minutes")


if __name__ == "__main__":
    app.run_server(debug=True)
Plotly Dash App with a Checklist and a Figure
This app starts with the earlier example of a dcc.Checklist with icons and adds a figure and a callback to make the app interactive. This app uses the stock tickers to get the price data for each stock selected in the checklist and displays it in the figure.

from dash import Dash, dcc, html, Input, Output
import plotly.express as px
from dash_iconify import DashIconify
import dash_bootstrap_components as dbc

df = px.data.stocks()

heading = html.Div(
    "Stock Performance", className="bg-primary text-white text-center p-3 h3 mb-2 "
)
checklist = dcc.Checklist(
    options=[
        {
            "label": DashIconify(
                icon="logos:apple",
                className="ms-1 me-3",
            ),
            "value": "AAPL",
        },
        {
            "label": DashIconify(icon="logos:facebook", className="ms-1 me-3"),
            "value": "FB",
        },
        {
            "label": DashIconify(icon="logos:netflix", className="ms-1 me-3"),
            "value": "NFLX",
        },
        {
            "label": DashIconify(icon="logos:microsoft", className="ms-1 me-3"),
            "value": "MSFT",
        },
    ],
    value=["AAPL", "FB", "NFLX"],
    id="checklist",
    className="ms-5",
)


app = Dash(__name__, external_stylesheets=[dbc.themes.BOOTSTRAP])
app.layout = dbc.Container([heading, checklist, dcc.Graph(id="graph")], fluid=True)


@app.callback(
    Output("graph", "figure"),
    Input("checklist", "value"),
)
def update(checklist):
    fig = px.line(
        df,
        x="date",
        y=checklist,
        hover_data={"date": "|%B %d, %Y"},
    )
    fig.update_layout(legend_title="Stock", margin=dict(t=10))
    return fig


if __name__ == "__main__":
    app.run_server(debug=True)
Plotly Dash App Styling with Bootstrap Utility Classes
The app above is styled with Bootstrap utility classes. Bootstrap includes dozens of utility classes for showing, hiding, aligning, spacing and styling content.
👉 Recommended: See all the Bootstrap classes in the Dash Bootstrap Cheatsheet.
Bootstrap utility classes can be applied to any Dash component to quickly style them without the need to write custom CSS rules. Just add them to the Dash component’s className prop.
For example, instead of using CSS in the style prop:
style={
    "backgroundColor": "blue",
    "padding": 16,
    "marginTop": 32,
    "textAlign": "center",
    "fontSize": 32,
}
You can use Bootstrap utilities in the className prop:
className="bg-primary p-1 mt-2 text-center h2"
Learn more about using dash-bootstrap-components library utility classes with a Dash app at the Dash Bootstrap Theme Explorer.

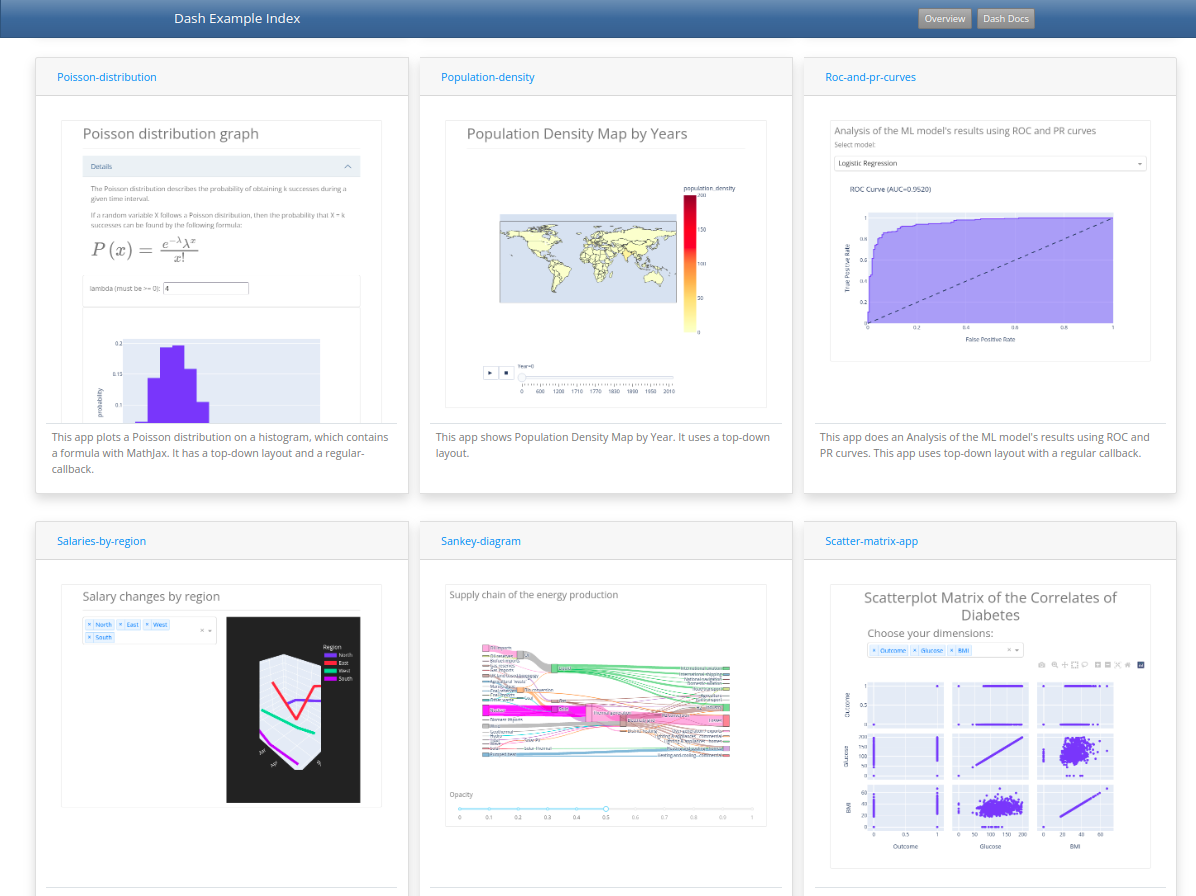
Plotly Dash Example Index
See more examples of interactive apps with Checklists in the Dash Example Index
Reference
Order Your Copy of “The Book of Dash” Today!

- Dash documentation – tutorial. Getting Started with Dash
- Dash Example Index. Sample apps
- Dash documentation. dcc.Checklist
- Dash Bootstrap Components documentation – dbc.Checklist
- Dash Iconify – Adding Icons to Dash components
- Dash Bootstrap Theme Explorer. A guide for styling Plotly Dash apps with a Bootstrap theme
The Book of Dash Authors
Feel free to learn more about the book’s coauthors here:
Ann Marie Ward:
- 👩💻 GitHub: https://github.com/AnnMarieW
- 💬 Dash Forum: https://community.plotly.com/u/annmariew/summary
Adam Schroeder:
- ▶️ YouTube CharmingData: https://www.youtube.com/c/CharmingData
Chris Mayer:
- 🐍 Python + Crypto Email Academy: https://blog.finxter.com/subscribe/